Changing from lead acid to lithium batteries for our travel trailer seemed like one of the most straightforward things we have done recently. Perhaps because John did all the work and didn’t mention any particular issues he had during the process. So this post might actual be quick and easy? Anything is possible! As long as you don’t mind a bit of math.
Our trailer originally came with a little battery that wouldn’t last very long off-grid, so we switched to a set of two 6-volt deep cycle batteries. That, plus a solar panel on the roof, allowed us to boondock and do most anything we wanted as long as we also had propane available. When we removed propane from the equation, all power now needs to come from the batteries (storage) and solar panels (generation) whenever we aren’t connected to shore power.
I’ve got a detailed energy usage spreadsheet that I’ll share in an upcoming post. Suffice to say, we needed more power, in both battery and solar system size.
We’ve known for some time that we would very much like to switch to lithium batteries because of the following factors:
- Higher energy density, i.e. more energy for the same mass
- More usable capacity
- Longer lifetime and many more charge/discharge cycles
- Zero maintenance
- Low self-discharge rate
The cost of lithium has come down, and will hopefully continue to drop. Cost comparisons should take into account the usable capacity and lifetime; for example:
Our previous lead acid batteries were 6 volt (2 in series), 205 amp-hour deep cycle with about 50% usable capacity. In other words, we could cycle them repeatedly down to ~100 amp-hours without a problem, but much lower than that would greatly reduce their lifetime. We paid $210-230 for a set of new batteries every couple years.
We’re making a very rough guess that our current lithium batteries will last 2-3 times as long. We bought four 12 volt batteries at 138 amp-hours each. Usable capacity is close to 100%. John found some excellent used Valence batteries that were previously installed in an electric truck. The data we’ve gotten from them suggests that they still have plenty of lifetime remaining. We paid $1956; a set of new ones runs upwards of $5000-6000 (2019 numbers; again this should drop over time), so John did really well finding these.
Running some back-of-the napkin numbers (very rough estimates for comparison only and assuming similar usages), for ~5-6 years worth of batteries:
Lead-acid with 100 Ah (1200 watt-hour) usable capacity, going through two sets at $220 each = $440, or $367 per kWh
Lithium at 4 batteries x 138 Ah x 100% yields 552 Ah usable capacity; our actual measurement for the used ones we have is ~6000 watt-hours; therefore one set at $1956 is $326 per kWh
New lithium batteries at $5000 for the set, with 6600 usable watt-hours… except they should last more than 6 years. Per the spec sheet for our Valence batteries, by 3000 cycles they will be slowly losing capacity and would be down to around 80% from where they started. Assuming a maximum of one full charge/discharge cycle per day, we could estimate lifetime of 8-10 years. Prorating this in order to estimate an equivalency to the other “6-year” numbers yields $505 per kWh
So for a basic (and probably not highly accurate) brute-force cost estimate, our lithium batteries cost the same as or slightly less than than our previous lead acid ones, per usable kWh. Buying them new would have cost a bit more. And hopefully in the future the lithium prices will drop and that will no longer be the case.
Next, looking at weight per kWh, there is a clear difference:
Our two lead acid batteries weighed about 120 pounds total for 1200 usable Wh; that’s 10 Wh per pound.
Our lithium batteries weigh 172 pounds total for 6000 usable Wh = 34.9 Wh per pound.
Which helped us add a lot of energy storage without requiring a big jump in battery weight (or space). And weight is likely to be a big factor when we eventually get to tow Howie with an electric truck.
Side benefits of lithium include not having to add water to the batteries every month and the ability to let them sit (disconnected from the system) without much self-discharge while in storage. This is especially helpful for us since we tend to do a variety of different things that have us storing Howie a few months at a time here and there.
We’re totally digging all of this, needless to say.
One potential challenge with lithium batteries is the need to monitor the temperature and only charge the batteries when the temperature is in an acceptable range. This range is between 32 and 113 degrees F. The discharge temperature range is between 14 and 122 degrees F. Normally lithium batteries come with a Battery Management System (BMS) that controls this for you, but our batteries are used (and as noted above, a really good deal) and did not come with a BMS. John is designing a work-around while we manually manage this for temperatures on the lower end, i.e. not charging them when it goes below freezing.
An update after Marc asked about the lack of a BMS (see the comments): Each individual battery does have an internal BMS, so the individual cells within it are kept to approximately the same charge. John tested the batteries when we received them and found them to be mostly equal in battery health.
OK, a short photo essay of the battery change-out.
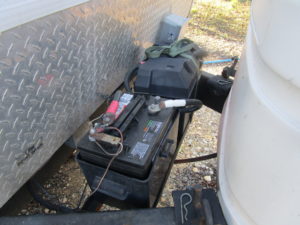
Our lead acid batteries (which we got at Batteries Plus; similar to the one found at this link), mounted on the tongue of the travel trailer:
John constructed a better battery box last year to protect them from the weather and while driving. Side note that coroplast is also great for making bike boxes for expedition racing.
Howie parked at the Beard Farm for some project work, including the lithium battery installation:
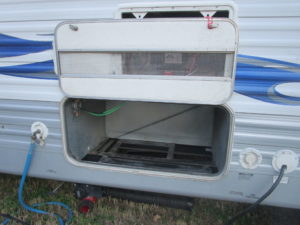
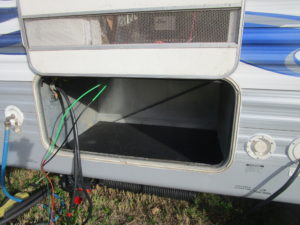
The space where our propane generator used to live before we sold it to Camper John:
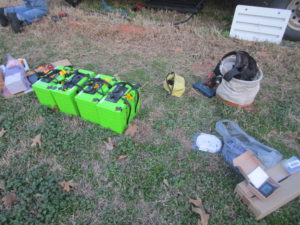
Batteries and various tools and stuff (John was in his happy place with room to spread out):
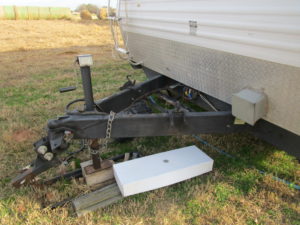
Howie has an empty tongue! No more propane tanks, no more batteries:
A new floor in the generator battery compartment:
Batteries stowed away, table set up with all kinds of useful things, and Battery Man is ready with the connector cables:
So… it wouldn’t be a “real” all-electric project post without at least one little thing going askew. This shouldn’t take long to explain, I promise.
John decided to wire the 12 volt batteries into 2 parallel sets of 2 batteries in series. This results in a 24-volt system. Our new fridge can run on either 12 or 24 volts, and supposedly the compressor is more efficient on 24. Other benefits include getting more power out of the inverter, smaller wire sizes, and half of the amperage flying around everywhere (because that’s what amps do, fly around).
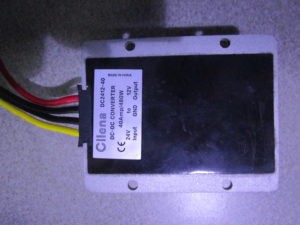
However, we also have a few things that need 12 volts: The lights (LED), bed lift, water pump, fridge fans, bathroom roof fan, stove fan, USB outlets, radio, and the trailer runaway brake. So we need a 24V-to-12V converter. These appear pretty simple, just an input and an output:
However! When the label is installed upside-down and 24 volt power is connected to the output side, the converter really doesn’t like that and tends to die immediately with a “pop!”
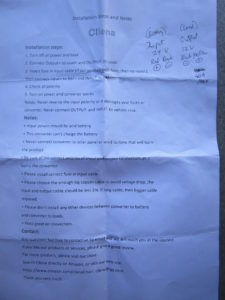
The instruction sheet where I added notes from some online research after it appeared that this is what had happened:
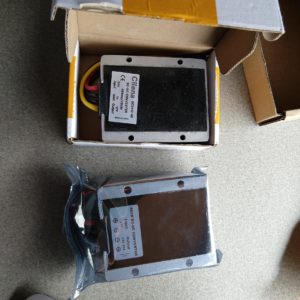
Yep, the supplier confirmed the upside-down label and refunded our money. We purchased a new one (and a spare “just in case” because we really don’t like to be without 12 volt power in case we lose another converter). All fixed! As problems go, that was one of the easier ones we have run into.
John removed the battery support from the tongue so I took another photo:
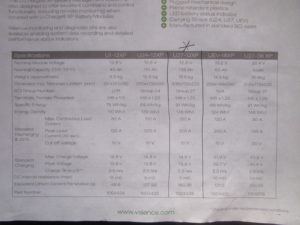
In case anyone is interested in the spec sheet for the batteries:
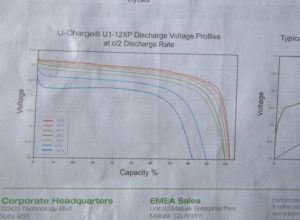
The curves showing how the battery stays at a constant voltage throughout most of the discharge cycle until it drops off right at the end. The different colors are for different temperatures, indicating that the performance degrades as the temperature approaches and passes below the freezing point:
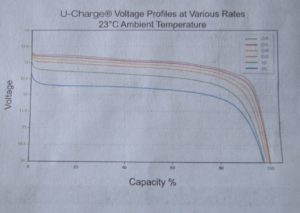
Another voltage vs. % discharge graph showing the same flat-to-dive curve except at different rates of discharge. “C” is the rate that would use up all of the battery energy in one hour, so it’s best to stay at half that rate or less:
We used the above curves when testing our current battery capacity, but I think I’ll leave that story for a future post.
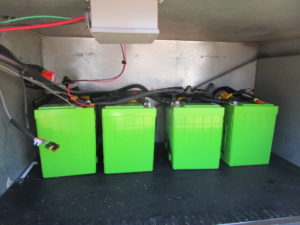
To close out the topic (for now), here they are! Our installed and fully-functional lithium battery bank. Welcome to Howie, y’all!
As always, comments, questions, stories of related experiences, checks of my math, all are appreciated. Thanks for reading!




Wondering why you connected batteries and 24 to 12 volt converter the way you did. You used two parallel sets of two batteries in series. You could also be a serial connection of two sets of batteries in parallel. This latter configuration could provide significant 12 volt capacity (half of your total capacity) without requiring a converter at all. This has the potential drawback: the four batteries are not all charged and drained equally. That could lead to some interesting situations if there’s a lot of 12 volt usage compared to 24 volt.
Hi Kurt and thanks for your question! You basically answered it – our 12 volt system uses a fair amount of energy, so hooking that up to only 2 of the batteries would result in them draining unevenly. John says that all of his battery training tells him not to do that, especially with lithium. We’re trying to keep them as evenly charged as possible to maintain their lifetime. It’s great to hear from you and thanks for commenting!
I’m surprised to learn you charge your new Lithium without a Battery Management System (BMS) !?! The BMS helps to prevent overcharging the cells that charge up faster than others and will extend the life of your batteries. Nowadays, some Lithium batteries are also packaged with an integrated BMS, specifically designed for that set of lithium cells and with a warranty that cover both cells/BMS as a unit, this makes them a practical drop-in replacement for lead-acid deep cycle batteries. I’m not saying you can’t add an external BMS, but I like the idea of the BMS designed for and integrated into the battery. I’ve been looking at building a solar generator and been reading about recommended lithium batteries. One brand mentioned is BattleBorn. https://battlebornbatteries.com/shop/12v-lifepo4-deep-cycle-battery/
4 of these batteries would cost more (~$950 each), but if they last longer… They have a 10-yr warranty and each 100AH, 12v battery weighs only 31 lbs.
Hi Marc!
As always, a thoughtful comment. We’ve realized that we left out an important piece regarding the battery management system. Each individual battery does have an internal BMS, so the individual cells within it are kept to approximately the same charge. Also, John tested the batteries when we received them and found them to be mostly equal in battery health. I’ve updated the post with that info.
Valence doesn’t sell a BMS for aftermarket/used batteries; John has tried to find some kind of substitute but hasn’t been successful yet. Putting in a third party BMS would require us to open each of the batteries, remove the onboard BMS, then connect the new system. More than we wanted to take on. So we know we’re taking a chance with our system, and the lifetime might end up lower than if we had a BMS in place to manage all batteries at once. The biggest caution is making sure we don’t charge them when their temperature is below freezing, but we’ve been able to manage that pretty easily. We decided that this is all worth it for the great deal we got for the used set, and we expect at some point in the future we’ll be replacing them with some new ones (with integrated BMS like you mentioned).
Thanks for the great info, we look forward to hearing about your solar generator, and we owe you another breakfast 🙂