I wrote about our refrigerator retrofit last year, ending with a successful changeover from absorption to compressor. Everything worked, with the exception of the controller (we had two consecutive circuit boards fail and leave the fridge stuck in the “on” position). At the time of the post, we were using a manual on/off switch. Since then we have added a homemade controller that is run with an Arduino board. We are about to replace the fridge so I better write about this while the Arduino is still relevant!
Also relevant is the one-year anniversary since we turned off the propane valve for the last time (September 20, 2019)! I feel like that is a nice milestone.
Because of the lower energy draw of this refrigerator, plus the battery and solar updates, we are currently over 160 days since we last plugged into an electric outlet.
Summary
In order to have a properly working fridge, i.e. one that we didn’t have to manually turn off and on, we decided to try creating our own little controller circuit. If it didn’t work, we would get a new fridge. This was pretty much the theme throughout the Arduino project – hmm, that’s not working. Let’s see if we can fix it; if not, we’ll just buy a new fridge.
Somewhat amazingly, we got it to work! There was plenty of problem solving and learning along the way; see below if you’re interested in reading the details. You can’t beat the hands-on experience, and I suspect we will use some of the knowledge (and the Arduino boards) again in the future.
The basic concept is that the Arduino is a little computer chip that you can program and easily connect to various inputs and outputs. I downloaded the software onto my laptop, wrote simple code, and transferred the code to the chip. John wired the chip into a circuit that was connected to the refrigerator power to turn it on and off. He also connected the temperature sensor from inside the fridge so we could send the reading to the Arduino.
I really enjoyed every aspect of this! It reminded me of my favorite parts of my Motorola and Freescale jobs when I got to program the tools and collect the data to analyze. I enjoy coding (when it isn’t too complicated) to monitor and control hardware. The Arduino project must have been fun, because we went through several iterations and instead of giving up, we got more invested in figuring it out.
Our old fridge + new compressor has kept our food cold for one year (almost exactly), and the Arduino controller is still working well. This mini-project has been an interesting challenge, requiring time, money, patience, and persistence. We appreciate everything we have gotten out of it. Next time though, we would probably just get the new refrigerator at the beginning. Or… maybe not!
Stay tuned for another post about the new appliance.
More in-depth story
Early on, I decided it would be really handy to buy thermometers to measure the fridge and freezer temperatures. Especially since our first iteration of controller was a simple timer; we would need some data to determine if the on and off times should be adjusted.
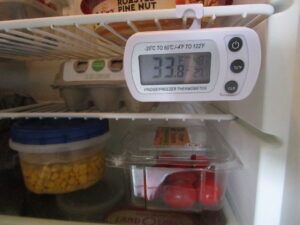
I like our thermometers a lot and will continue to use them in the new fridge. One version sits inside, so you have to open the door to read the numbers:
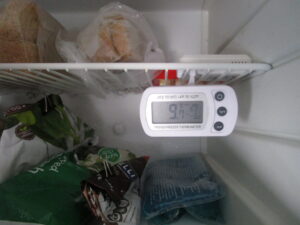
Freezer temperature:
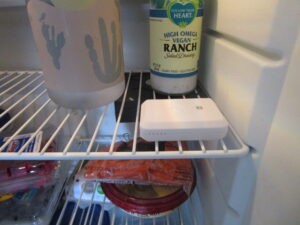
The more-useful set has wireless sensors plus an external display. The sensor for the wireless version:
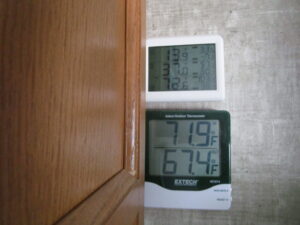
On the temperature readout, the top number is the freezer and the next one down is the refrigerator. The next two are the ambient temperature inside Howie, and the bottom number is the temperature inside the battery box (so we can monitor to make sure it’s above freezing whenever it is being charged).
It’s really nice not to be “flying blind” like we were at the start of this project. I think all refrigerators should have an external temperature display.
The rest of this post is focused on the coding and wiring of the Arduino. Fair warning – I’m leaving out plenty of details and trying to keep it condensed, but it does get technical. Here’s a good place to stop reading if you have no use for these specifics. On the other hand, if you have questions or want even more of those details, contact me and I can ramble at length about what we learned.
The first step was to put the fridge on a timer so it cycled on and off at regular intervals. This was a) a proof of concept (coding and wiring wise) and b) necessary if we were ever going to leave the fridge alone for more than half a day at a time!
I played with programming the Arduino while John took on the role of physically wiring the circuit.
On the software side, I started with the beginner “blink” program. It sends on and off signals to an LED light, using the delay function in between each signal. So for example, I could have the light turn on for 5 seconds and then off for 3 seconds, then repeat as long as there is power to the board.
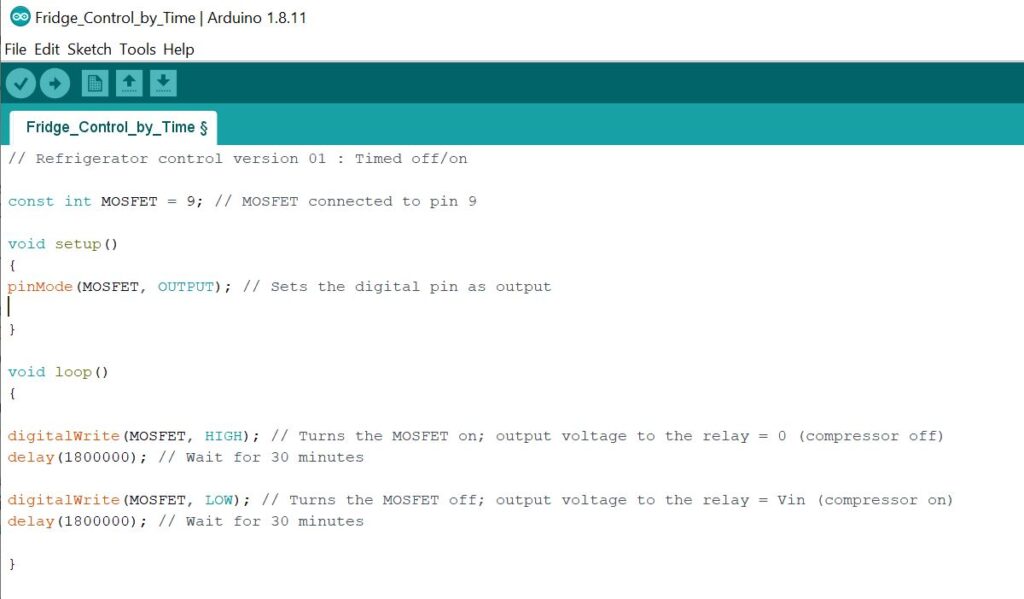
We would do something very similar with the refrigerator, turning it on for 30 minutes and then off for 30 minutes, repeat. Seemed pretty simple. I used the example from the “Getting Started with Arduino” book:
I figured John had the tougher task with the wiring, but that was right up his alley. We make an effective team.
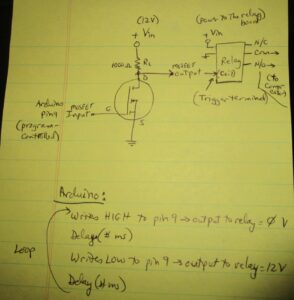
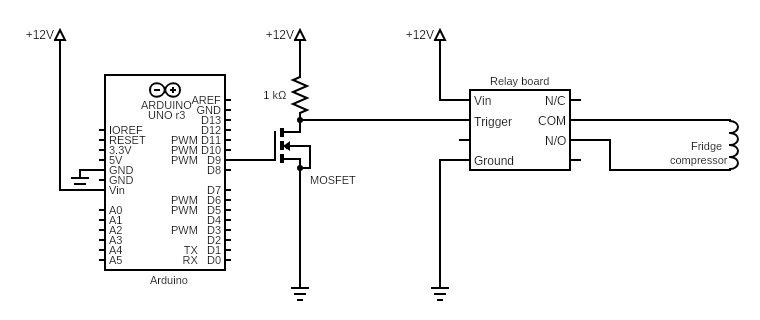
I programmed the Arduino to send an “on or off” signal to one of the output pins. John connected that pin to a MOSFET, a transistor that acts like a switch:
– The Arduino output pin connects to the MOSFET input “gate”
– One side of the MOSFET output connects to Vin (voltage in), going through a resistor along the way to keep it from shorting
– The other side connects to ground
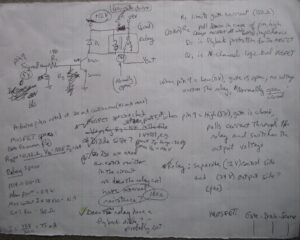
That’s the description of the left half of this crudely-drawn circuit diagram, with the Arduino chip connected to the MOSFET:
A cleaner version, created with a circuit diagram editor:
The other half of the circuit is a relay board. It works with the higher current that is needed to control the refrigerator. The Arduino can handle only small current, so it cannot be connected directly to the refrigerator power.
We started with a relay board instead of an individual relay component because that is what John found at the electronics supply store in Tennessee. This board is powered with 12 volts, the relay opens and closes based on the output from the MOSFET, and the fridge circuit turns on and off depending on the state of the relay.
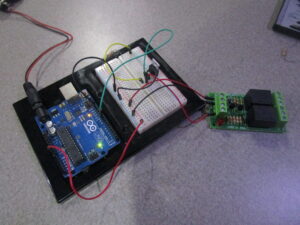
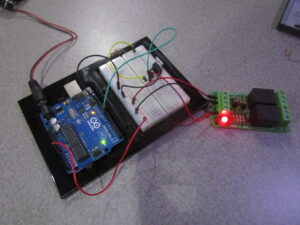
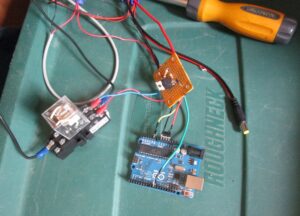
Here is the blue Arduino, the white breadboard with the black/silver MOSFET on the right side, and the green relay board:
The light turning on when the relay switches on:
And (when connected up)… the fridge also turned on. 30 minutes later it turned off, repeating as programmed. Yay John, our first test worked! We had a basic functioning controller. I’m an electrical engineer because I love the “on paper” stuff – wiring diagrams, graphs, equations and math – not because I played with electronics as a kid. So this was a kind of magic to me. Seeing our design actually work in real life was very cool.
Our first guess was 30 minutes on/30 minutes off. We modified based on the thermometer readings and adjusting a bit for outside temperature fluctuations, eventually returning to 30 on/30 off. That kept the refrigerator in the mid-30 degrees (F). The freezer was in the high 20’s. This was last January in South Carolina with outside temps in the 40’s.
Next step = Temperature measurement and control
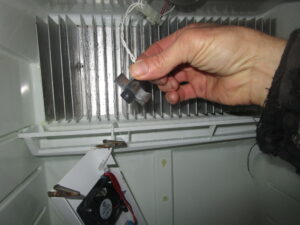
There was already a thermistor (a variable resistor that is temperature-sensitive) inside the refrigerator:
John ran the wire from it to the “access port” where we were playing with the Arduino controller.
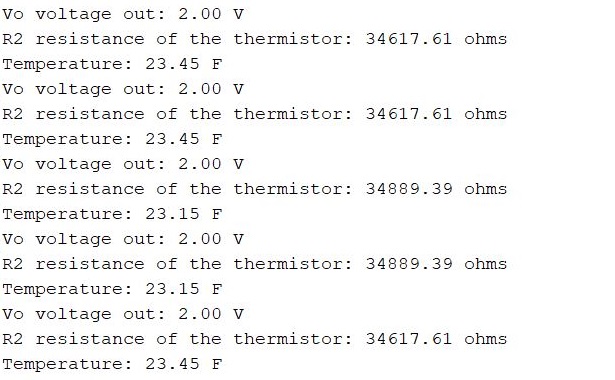
I found a guide for setting up an Arduino temperature sensor – isn’t the Internet great? The key pieces are a voltage divider to measure the resistance of the thermistor, plus an equation (Steinhart-Hart) to convert resistance to temperature.
There was some debugging and learning how to set up a readout on my laptop to see the output values real-time (super useful). But it looked like the resulting temperature was incorrect – it should be around 33-34 degrees F:
John guessed that there was something wrong on the software side and I of course was rooting for it to be a hardware problem. We went through the program line-by-line and talked about the circuit wiring, the programming (which I had basically copied from the example), and eventually we got to the Steinhart-Hart equation for converting resistance to temperature.
It’s amazing what you can discover when you’ve got someone asking you to show your work.
One Google search later and we hit upon a one-pager describing a 10 kiloohm thermistor. By the way, I love the word “kiloohm”. It turns out that the constants in the equation were not exactly what I had programmed.
Ah ha! I had set up the program based on a 100 kiloohm thermistor, when it appears that we actually have a 10 kiloohm one. So simple, and also, John was right – software problem.
Fixed that and voila – temperature readings of around 33 degrees F. Geeky happy dance.
Once that was fixed, we figured out how to combine everything to:
a) Read the temperature
b) Use it to control when to turn the fridge on and off
We eventually did some tests that showed thermistor temperatures reading several degrees lower than the little fridge thermometers (the pictures at the top of this post), so I adjusted the upper/lower limits in the control software to account for that instead of spending any more time trying to get everything exactly correct.
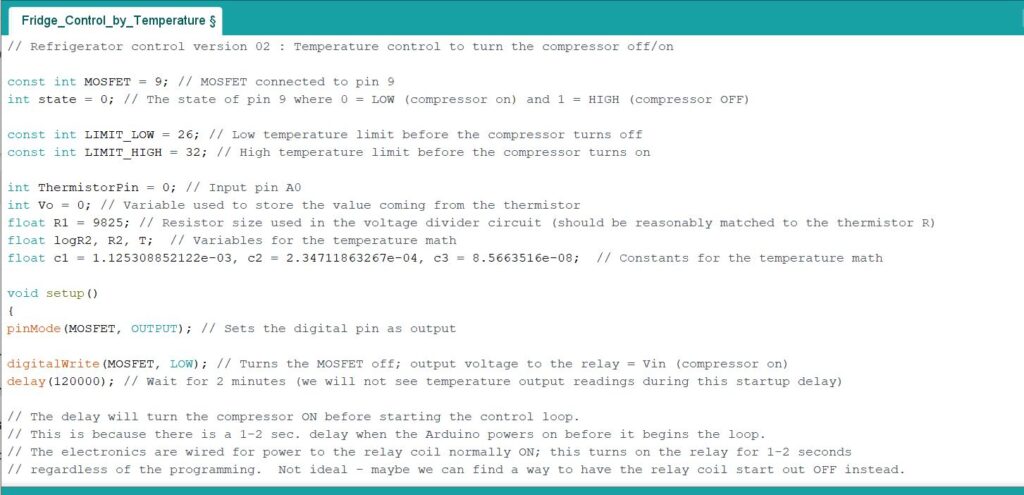
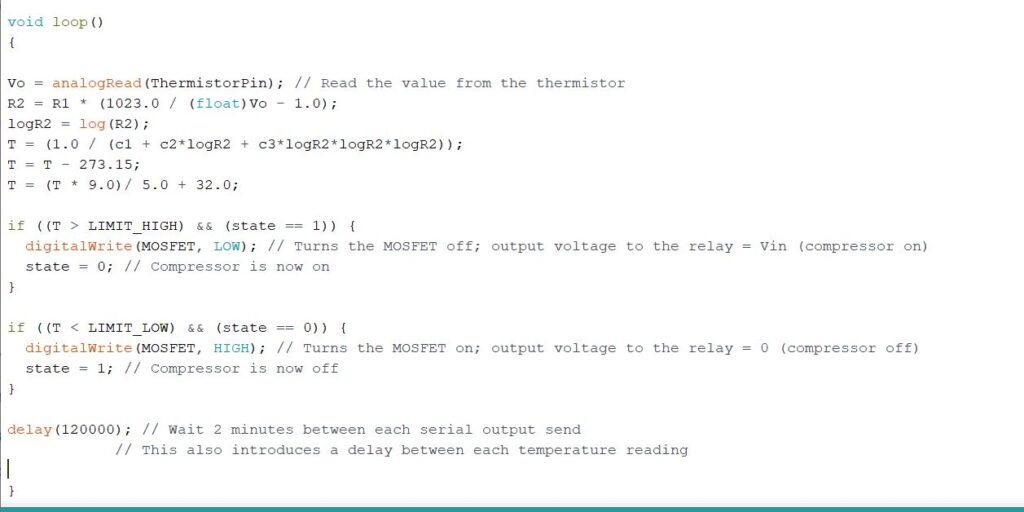
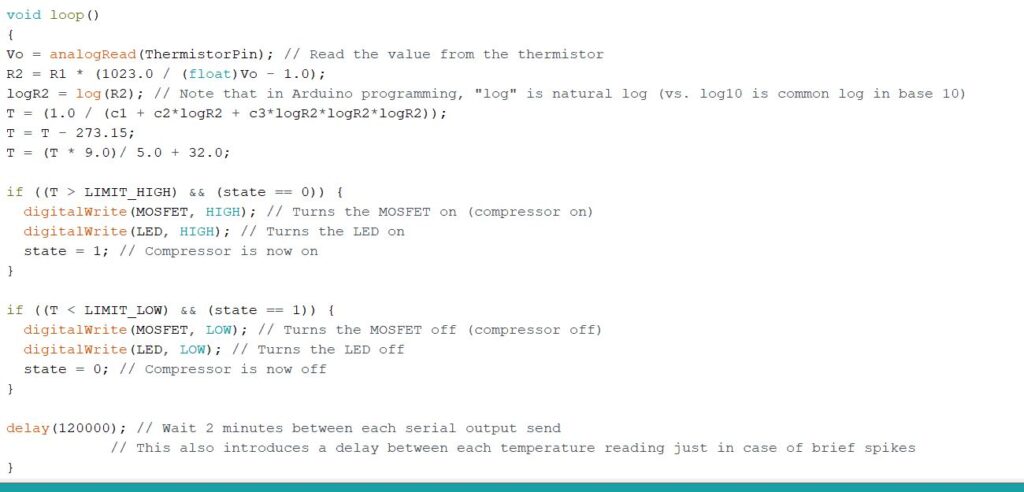
The Arduino code (which worked once I figured out that a single “=” is not the same as a double “==” in Arduino speak):
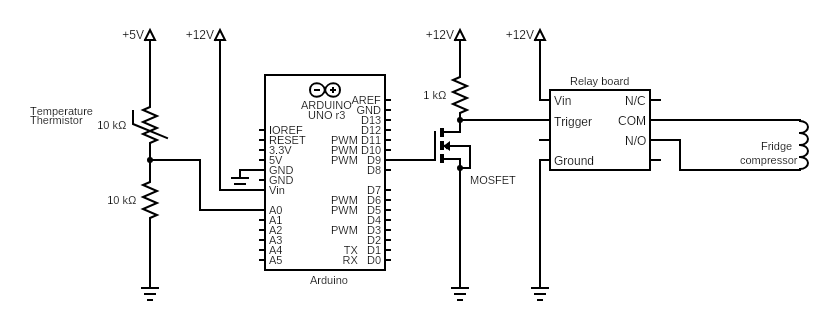
The wiring diagram with the thermistor added on the left side:
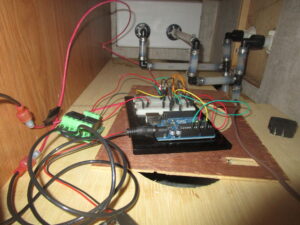
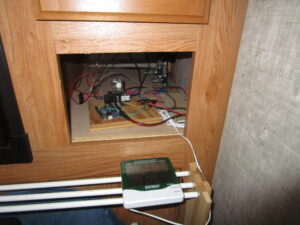
And the circuitry in the cubbyhole, with a few more wires now:
It took some adjustments to the upper/lower limits to find a temperature range for both the freezer and the refrigerator, but we eventually found something that works well. Part of the solution was to defrost everything and start from scratch, something I’ll explain in more detail in that future post I promised.
Somewhere along the way, John got the fridge light, door heater, and fans working correctly again. The door heater prevents condensation around the edge of the door, the light is obviously helpful to see what’s inside, and the fans keep air moving to reduce frost buildup. He rewired the original board so that when the door is open, the light is on and the door heater is off (and vice versa); that’s the only function of the board now, but it kept us from having to figure out another homemade solution. He added another relay to turn on the fans inside the fridge when the compressor is on. So the basic functionality of all the extra little items is back in place.
Those are the main pieces to the endeavor, and normally I’d end here with an “it works and all was well” comment. However, because our project is apparently trying to teach us many things, we had to work through some other issues.
The biggest one was that the relay board started sticking. Just like the two fridge boards before it. So we finally learned about compressor motors causing arcing, relays becoming micro-welded, and how a “thump” with the flick of a finger can loosen it so it works again. Multiple thumps later, and we needed to figure out a better solution (especially since we were back to the problem of not being able to leave for very long at a time).
I found out that we should add a flyback diode across the compressor motor to eliminate the stranded voltage problem (which happens because a motor winds down instead of just turning off immediately). It’s possible that this type of fix might have been useful to keep the original refrigerator board from getting stuck in the “on” position; we pursued that briefly but moved back to working with the Arduino instead.
The major redesign included:
– Adding a flyback diode across the compressor to fix the stranded voltage problem
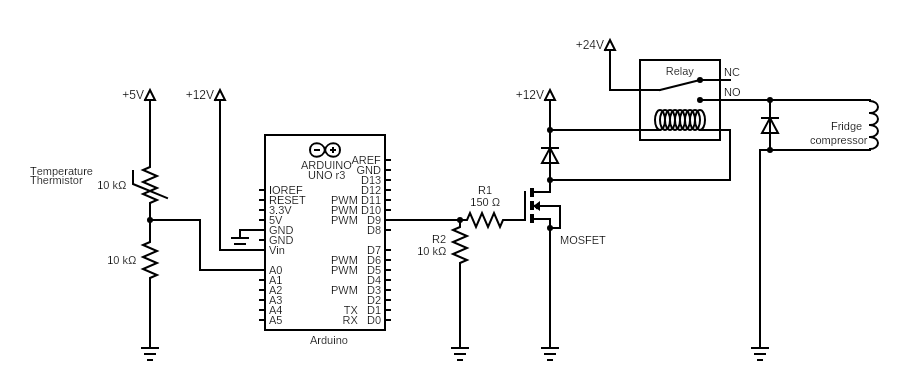
– Switching the relay board to an individual relay, and changing to a low-side driver circuit to run it more “correctly” (with protection resistors, a flyback diode for the relay itself, and the right voltage to drive it). This solved several problems for us.
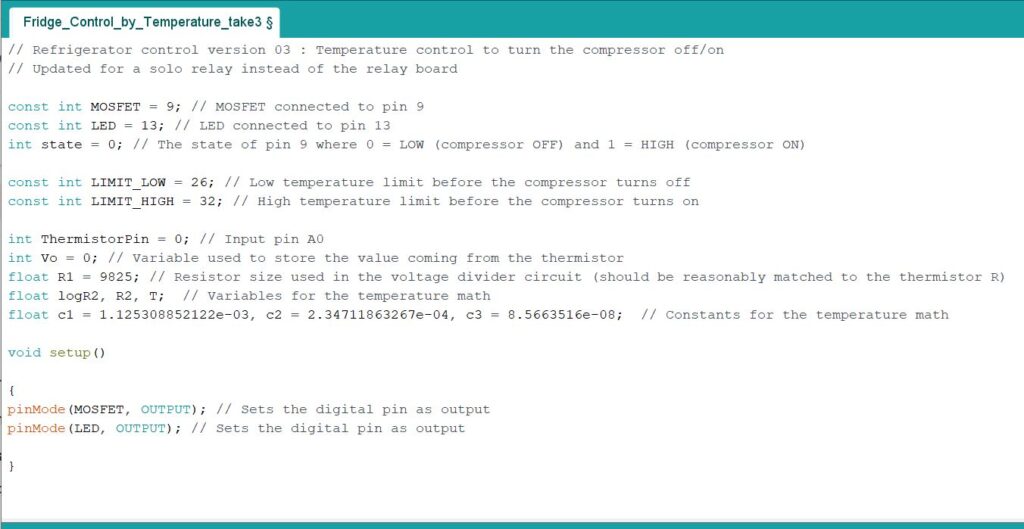
– Updating the Arduino software to account for the reversal in on/off states (pin 9 high now means that the compressor is on instead of off).
We killed only one MOSFET along the way with incorrect wiring.
The new code:
My first pass of a wiring diagram with a gazillion notes, and I’m not really sure why I’m compelled to include this except that it makes me stand back and say “holy cow”
The current wiring diagram in a much-easier-to-read format:
John redid the circuit and then soldered the main circuitry onto a more permanent board to eliminate the little wires and potentially unstable connections:
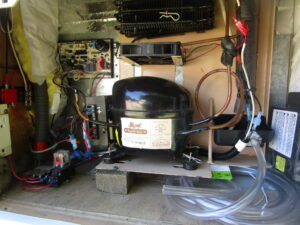
The back of the refrigerator:
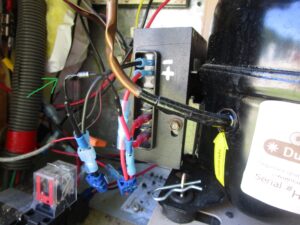
And a close-up of the flyback diode across the compressor (green arrow points to it):
Now we have all the circuitry nicely mounted on a board so it will sit still for travel; the temperature readout is mounted on the wall like in the photo at the top of the post:
Finally! That’s the end of the explanations and diagrams. Everything worked from that point forward and I consider our first Arduino project to be an (eventual) success. And although I’m happy we are finally getting a brand-new refrigerator, I will be a little sad to turn off the faithful Arduino that has been going and going for many months without fail.
Along the way, we had some other ideas that we haven’t acted on, such as:
– Getting our Arduino WiFi board going (for easier access to the programming and data)
– I had visions of using the Arduino to translate the thermistor temperature sensor data into an LED display, but the thermometers (especially the ones with the external readout) made that unnecessary
– Using a potentiometer in the voltage divider circuit to allow us to control the temperature setting by varying the potentiometer resistance
But most of all, we’d love to try a similar project with the water heater…
Pretty Cool ! A couple of questions: Where can I get the digital thermometers you are using inside and outside the fridge?
Isn’t 33 degrees a bit too close to freezing for the fridge ?
I use cheap analog thermometers in my fridge at home and I believe they are marked for the right temperature for the fridge around 40 degrees F and 10 degrees F for the freezer.
An interesting thing I observed is that the temperature at the top of my fridge (where the cold air come in) is lower than in the rest the fridge, so even though my thermometer reads 40 degrees, sometimes things at the top of my fridge freeze so no more bottles at the top of my fridge 🙁
Marc
Hi Marc!
Here is the hanging/non-wireless version:
https://www.amazon.com/Refrigerator-Thermometer-Digital-Waterproof-Function/dp/B01KQAN1WM
And here is the one where you can read the temperatures without opening the doors (takes quite a few batteries for all the pieces):
https://www.amazon.com/Version-KeeKit-Refrigerator-Thermometer-Wireless/dp/B07VTSDGHT
They are usually within a couple degrees of each other.
33 degrees is near the low end for the fridge; a typical range is from 32 to 45 F. The high end depends a lot on how often we open the door and how much not-so-cold stuff we put in there after a shopping trip. We usually have the sensors near the top shelf. I haven’t tried to characterize temperature by location within the compartment.
No issues with anything freezing in the fridge. While setting up the limits in the Arduino code, I read somewhere that 35 to 38 degrees is ideal (no lower than 32, no higher than 40). That seems to work for us, based on the little thermometers. It kept everything cold, all the drinks were nice and chilly, nothing frozen.
We’ve got no direct control over the freezer (same as all fridge/freezer combos everywhere, as far as I know), and it changes a lot depending on the outside temperature – when it’s hot out, the fridge stays on all the time and the freezer is very cold (around 0 F). When it’s cold outside, the fridge is off more than it’s on and the freezer can warm up to near 32 F.
Well, that all applied to the old fridge, the one with the Arduino controller. Crazy frost buildup, inability to keep it cold when it was really hot outside, using more energy that we’d like; we suspect all related to poor insulation. It was built in 2006 and has done great for us for many years but it seems like it’s time to stop limping along with this one.
So now we have a new fridge to play with. Hopefully those issues are gone. After a couple days, so far so good.
I’ve deliberately frozen bottles of water when running in 90-100 degrees in Moab – what a treat in the middle of the desert. But anyway, I can see where that isn’t something you’d normally want!
-Marcy