Our trailer came with an RV-style refrigerator, meaning that it cools with absorption and could be powered by propane or AC electricity. “Absorption” is apparently a process that uses heating in order to provide cooling. Although I have an engineering degree (and therefore should really try to figure out how that makes sense), it’s an electrical engineering degree and therefore I claim no real knowledge of fluids or heat transfer. Try not to remember that I said that when it comes time to talk about electronics…
Anyway, if you’re interested, this site has a detailed explanation (that I skimmed):
https://www.sciencedirect.com/topics/chemical-engineering/absorption-refrigeration
The ability to use either propane or AC electricity to power the fridge is quite versatile and appreciated. We could boondock (without an external electricity source) and switch to propane. Anywhere we had shore (external) power available, we’d switch the fridge to run off electricity and save the propane.
A while back, John ran some tests and gathered some numbers and determined that if we wanted to remove the propane from the equation, our refrigerator would turn into a large power draw. There are small compressor refrigerators available, similar to what most houses have, and some that even use DC power. The power requirements for these fridges are much lower. We should also note that these fridges are much newer than the one that came with our 2007 travel trailer, so perhaps that is part of the difference.
In addition, switching to DC power would enable us to keep the fridge running without turning on the inverter. I’ll go into more detail about AC and DC power in a future post. In a nutshell, the electricity comes directly from the batteries (DC) to the fridge (also DC) without needing to be inverted or converted to anything else. There isn’t much power lost in the process.
John looked at various options and hit upon the idea of retrofitting our current fridge, a Norcold model N611. A company called JC Refrigeration sells kits that do just that. We happened to be traveling near their location in Shipshewana, Indiana, so we set up a purchase in advance, swung by, and picked it up.
What follows is a really-too-long (and not yet finished) saga of the installation and the sequence of events afterward.
The short version
The retrofit itself went well, with only a few minor hiccups that we sorted out and fixed. The compressor kit works great and the refrigerator cools well. And if it runs continuously (without ever taking a pause), it can even freeze everything in the fridge portion as well as deep-freeze the freezer part. How do we know this? Because the controller board (an original Norcold refrigerator part) stopped functioning properly. As did the replacement board.
So we’ve got a fridge that works – too well. John installed a manual on/off switch and we are making progress on an automated controller. This process has been quite interesting, but it’s not one that I’d necessarily recommend.
On the bright side, it’s running on DC power, it’s quiet, it’s cold, and it uses a lot less energy than the absorption version. And there’s no propane!
Knowing what we know now, we would probably have done things differently. For more on the key pieces of learning, feel free to skip to the bottom of this post.
The full story
Here are the gritty details! With a few photos mixed in to break up all the words.
John started with a video from Morton’s on the Move, which was super helpful for figuring out the installation details. JC Refrigeration even referred us to this video, that’s how good it is.
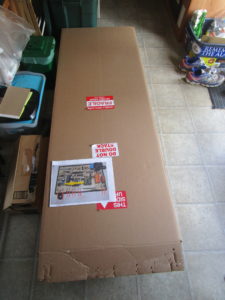
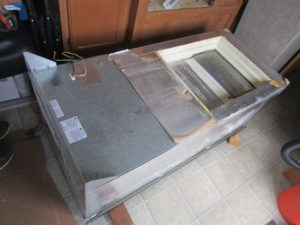
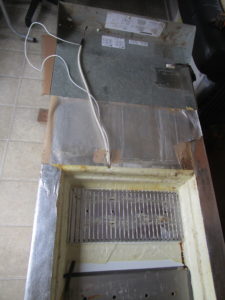
We spent $744 for the DC fridge retrofit from JC Refrigeration. It came in a long flat box that we set in the trailer for the trip from Indiana to Springfield IL. We parked there for a while so we could work on the install. And see the Land of Lincoln. Anyway, here’s the box:
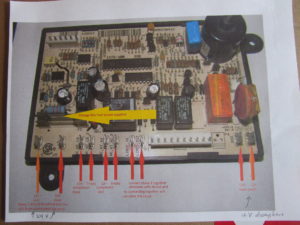
They printed out a photo of the controller board (the one that came with the fridge) with notes about how to rewire it. We would be using the same board, just changing some of the inputs and outputs. I was surprised that one board could handle both propane/AC power and no propane/DC power, but apparently it is that versatile.
A description of the retrofit:
– The body of the fridge and the inside areas stay the same. The back/cooling system is changed out.
– No more propane line!
– The 12V controller wires are the same.
– The 120V AC plug is removed and the compressor is powered by 12V or 24V from the batteries.
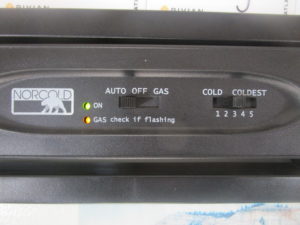
– The front controller switch now just turns it off and on (no Auto/Gas settings). At least, that’s what should happen. More info below.
Since my notes from this point forward are organized by dates, I’ll include those so you can follow along with our storyline. Suffice to say, this was not a one-day project.
August 30, 2019
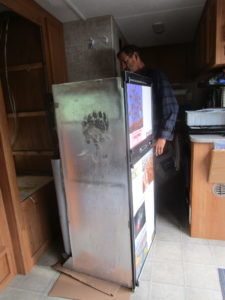
We put all of the fridge food in a good cooler with a big pack of ice and turned off the fridge. John began the process of extracting the appliance from the space it had been living in:
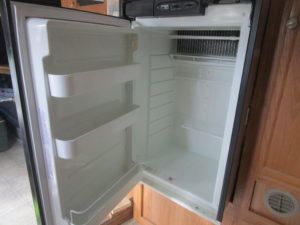
We cleaned and dried the inside. It’s good to do a defrost and wipe-down once in a while.
John disconnected the wiring and propane from the back, then added a cap to the propane line (provided as part of the kit). He pulled out the fridge and set it on the floor.
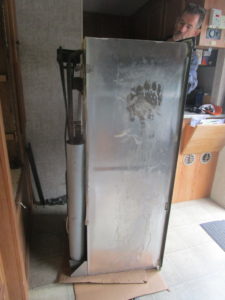
Another view, where you can sort of see the old absorption assembly:
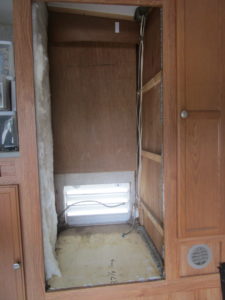
I did some cleaning in the fridge space, using the Homer Bucket vacuum to suck up little mud dauber nests, spider webs, dirt, and a couple dead ladybugs – I appreciate any chance to tidy up the hard-to-get-to spaces!
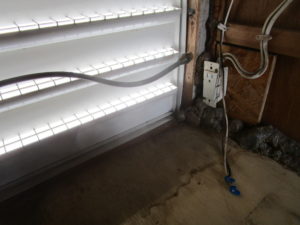
A closer look at the back of the fridge area, with the AC outlet (no longer needed) and the propane line (which has since been removed):
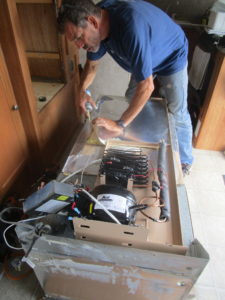
John removed the old cooling unit from the back of the fridge, cleaned off the old sticky stuff, and got everything ready for the new assembly. The video from Mortons on the Move has plenty of information on this process, which is good because I didn’t go into great detail with our set of photos.
Another look at the fridge on the floor, something you don’t see every day (and hopefully very infrequently):
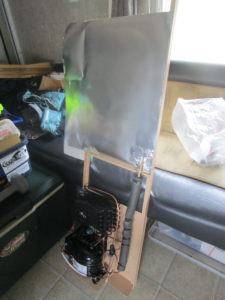
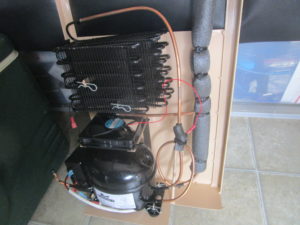
The new parts, out of the box and ready to go:
Zoomed in on the compressor:
We worked on what to do with the new fin fan (the fan that goes inside the refrigerator), trying to figure out how to clip it in place and where to connect it to 12V DC. John called JC Refrigeration and got the answer that the wires need to be run out the back with the drain tube and spliced in back there – got it. The fan switch is manual on/off for reducing condensation and helping keep the temperature more evenly distributed. John is planning to rewire it so the fin fan turns on/off with the compressor.
We tested the new assembly for fit – seems good!
John removed the fridge fins to see how they would line up with the new cooling assembly. I’m only mentioning it because he put them back in upside-down so the screw holes no longer lined up. We didn’t notice until the next step in the process, unfortunately.
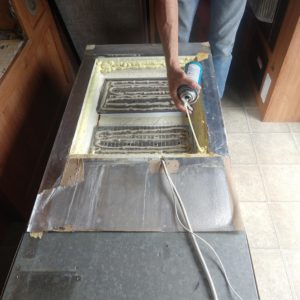
Adding spray foam for sealing:
We set the new cooling assembly in place and John went to screw it together from inside the fridge. Which is when he realized that the fins weren’t at the right orientation, oops! We quickly laid the whole thing back down, removed the cooling assembly, fixed the fins, and set the assembly back in place. It still sealed and seems OK, but we’re planning to pull it out sometime to redo the thermal mastic and the sealant just to be sure.
John reinstalled some screws for the fins and the freezer cooler plate to hold everything in place. The new unit seems to stick out a bit past the back of the fridge (it’s not quite flush) because of the size of the foam, but it looks like it seals up fine and John doesn’t think it will be a problem.
Adding more spray foam and tape to finish sealing everything off:
We reset the fridge in place, John continued to work on it, and I went for a run 🙂
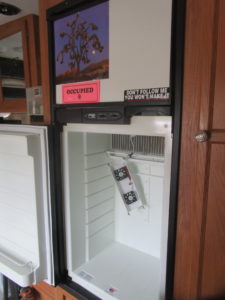
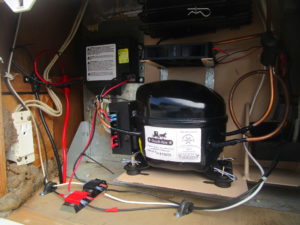
Continuing on, here is the fridge back in place, with the fan waiting to be clipped in:
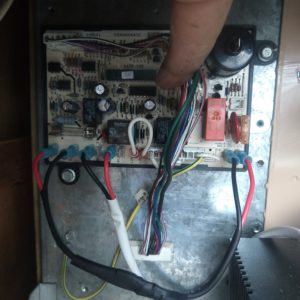
John made modifications to the controller board per the photo at the beginning of this post: He swapped a fuse, connected 12V for powering the compressor from our battery system, and reinstalled the 12V input to the controller board. They said to jumper out a couple terminals but there was already a jumper in place. He spliced in wires to power the compressor fan and the fin fan with 12V DC.
The instructions were to let the fridge sit for 12 hours before turning it on. We waited probably about 4 hours before running an initial test.
When powering it on, we set it to “Auto” because the only other option is “Gas”. It would attempt to turn on the propane (the sparker runs a few cycles) and then the lights would flash, but JC Refrigeration had told us that that’s normal. They didn’t say that it would do this every time the compressor turned on, but OK, we can live with that.
Our first issue was a lack of power to the compressor. John troubleshot (troubleshooted?) the problem to a loose fuse holder prong. He tightened that up and Voila! Power to the compressor and it turned on like expected.
And then 5 seconds later it shut off. Every minute or so it would try again, 5 seconds on and then back off. We decided to leave it off overnight, get closer to the “wait 24 hours” instruction, and try again.
August 31
Initially the compressor still wouldn’t stay on longer than a few seconds. Then later in the morning, it seemed like we finally had success! A powered-up fridge. Until evening, when it was back to cycling on and off.
We noticed that our battery meter read 12.8 volts in the evening. The meter shows over 13 volts in the daytime when the sun is shining on our solar panels and charging the batteries. Was that difference in voltage enough to cause a problem with the fridge?
September 1
John was doing some troubleshooting when he discovered that the voltage at the fridge was less than 10V. That’s a large drop in voltage between the batteries (12.9V) and the fridge, for not a whole lot of distance between them. And the fridge requires at least 10V to run the compressor.
Maybe the wire gauge is the problem… AWG #12 might be too small.
Then John discovered that the actual wire length (from the batteries to the refrigerator) was quite long. Between that and the wire size, perhaps he had discovered the issue.
As a stopgap, we turned on the converter to activate trickle charging from the shore power into the batteries. That upped the overall voltage in the system enough to keep the fridge on (11.5 to 11.8V at the fridge, well above the 10V minimum).
Partial success! And a plan for a fix. In the meantime, we needed to be plugged into shore power in order to run the refrigerator.
September 3
As of this date we could say for sure that the system works like it is supposed to. Plenty cold, ice in the freezer, and I’m guessing we must have moved all the food back in by this point, if not sooner!
September 12
John ran #6 wire directly from the battery to the fridge (at a much shorter distance than before). And it worked! There is no longer a large voltage drop and the fridge stays on even when the converter is off. Yay!
We had two occasions where there was no DC power to the fridge (no fan, lights, or power to the board), so John worked with the connectors and got it to turn back on. It seemed like a slight open somewhere. John redid the wiring to hopefully “solidify” everything, and we’ve had no more issues with that. Yay!
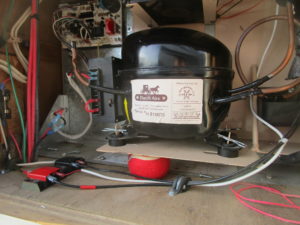
At some point (I’m not sure of the date), John discovered that the loud hum we hear when the fridge is running was coming from the vibration of the compressor. He found an easy fix for it — here is a “before” picture:
See if you can spot John’s highly technical solution:
September 20 – a momentous day!
We turned off the propane to Howie!
Driving and boondocking were now possible without propane, simply because of this fridge retrofit. Sure, we were still limited on electric power, but it was a start.
We were already playing with an electric induction cooktop (you guessed it, future post!). Perhaps we’d still want to use propane for some types of cooking, not sure yet.
Also, if we were not plugged in and didn’t have enough battery for things like heating air/water, we would still like to have the propane available.
So we had not yet committed to never turning it back on.
But we never did turn it back on. I would just like to pause for a moment and appreciate that day back in September 2019 when we closed the propane valve for the last time.
September 24
We started using solar during the day to charge the batteries. That worked great, plenty of juice to power the fridge. It didn’t quite seem like we had enough battery capacity to run the fridge overnight without dropping way down in battery %… and we were not really wanting to try it, so I’d switch to shore power (by turning the converter back on) overnight.
Our batteries at the time were the lead-acid version with 205 Ah (12V), so about 2.5 kWh. And you aren’t supposed to run them down below 50% capacity, otherwise their lifetime will drop a lot. Which means a useable capacity of about 1.25 kWh. I’ve run some numbers (see below) showing that we perhaps could have kept the fridge running on the batteries overnight, depending on how much additional DC power we used. But it would have been close.
So we could easily travel down the road with a working fridge, but we needed to hop between electrical hookups until we got the next phase in place – more solar and big ole lithium batteries! I don’t foresee running out of stories to blog about for the next several months…
But wait! This story isn’t over yet, I’m getting ahead of myself.
October 16
We returned from a solar installation trip to find that everything in the fridge was frozen. Luckily there was not much food in there. The fridge now stayed on no matter what, as long as there was pass-through power through the board to the compressor. Turning it off with the switch in front didn’t work. Disconnecting power to the board didn’t even work! It still stayed on. So something like a relay or controller seemed to be broken.
Was it because of the retrofit? Or because the board is just old? Coincidence or causality?
We ordered a new board to troubleshoot. $120. Well, if it works, it’s worth it.
The old board with nothing obviously blown:
October 21
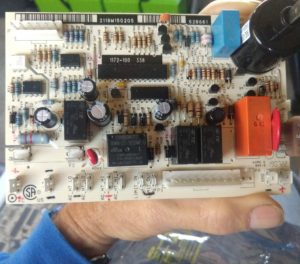
John installed the new board and everything is working again. The compressor cycles on and off like it’s supposed to. Yay?
The new board, ready to install:
December 7
Now the compressor is turning on LESS than it’s supposed to. Parts of the freezer aren’t frozen.
We removed the food to an external fridge/freezer. I defrosted our refrigerator and left it off for a week. It was good timing since we had access to a place to put our food, and John would be working on the solar electrical connections and could turn off the electricity as needed.
December 15
Now it was back to the state where nothing would turn the fridge off. Everything freezes solid, even if the switch in front was off – AGAIN. For whatever reason, the controller board does not want to play nice with the new unit.
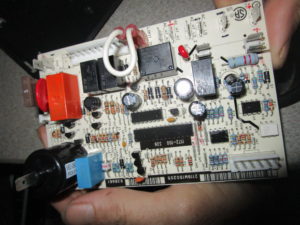
John discovered that a relay on the board doesn’t look so good – it’s the black box on the right third of the board, just southeast of the red capacitor:
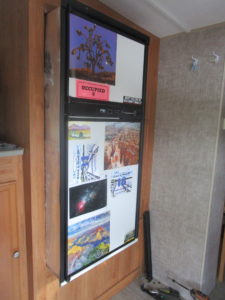
John wired a manual on/off switch inside the trailer:
We can manage the temperature ourselves, turning it on during the day (part of the time) and off at night. The goal is to keep everything cold but not freeze the fridge items. It’s obviously a temporary measure, assuming we ever want to leave the trailer for more than a day at a time!
The longer-term plan is to figure out a way to control the compressor based on a fridge temperature sensor. We’re making progress with a fun little Arduino project and I’m collecting notes to write about it in a future post.
Stay tuned.
Some data
Here are some #’s from the old and new fridges, with the caveat that the comparison isn’t quite apples-to-apples:
Data from the original fridge – cooling using 120V AC power (absorption cooling):
2.4 A at 112.5 V = 270 Watts
Over a 98-hour period with an outdoor temperature range of 75 to 110 deg F, total usage was 25.65 kWh, which is about 6.3 kWh per day.
1 hour at 270 W = 270 Watt-hours; multiplied by 24 hours = 6.5 kWh; so in that test case, with high temperatures in the desert summer, the fridge was on most of the time. Duty cycle ~97%
(We didn’t run numbers using propane; assuredly the amount of electricity required was much lower, but the amount of fossil fuel used was higher than we’re aiming for, i.e. greater than zero.)
Data from the new (retrofitted) fridge – cooling using 24V DC power from the lithium batteries (compressor):
2.3 A at 26.6 V = 61 Watts for an initial reading (22% of the wattage compared to the absorption cooling using AC electricity)
Better-refined numbers:
Compressor = 58-59 W
Inside-the-fridge fin fan (manual switch) = 2-3 W
Compressor cooling fan = 2 W
We need to redo the actual 24-hour energy usage measurements once we get the controller working again.
For the desert summer situation when the fridge is running most of the time, 100% duty cycle will require about 61W *24 hours = 1.5 kWh per day
If we assume an 80% duty cycle is more normal, then that comes out to about 1.2 kWh per day. We will get more data on this as we go, as the outdoor temperatures change (and hopefully heat up soon!).
We will have some temperature data from inside the fridge/freezer for the next installment of this saga.
And for more calculations on power requirements of the DC fridge and sizing the solar system, watch for an upcoming post.
“Would do differently”
Things we learned and would not (or might not) repeat if we knew before what we know now:
– Measure voltage at the fridge to verify that there isn’t a large drop in the wiring from the batteries.
– Verify the orientation of the fins before installing the new components (so we don’t put them in upside-down the first time).
– Regarding the board going out (twice), we still don’t understand why that is happening. So perhaps just replacing the entire fridge with a new DC compressor version might be a better approach. We have learned a ton, saved some money, the fridge itself (well, everything except that board) still works well, and we didn’t have to deal with different size models. Also there is less “carbon cost” for not buying a completely new appliance and having an old one to dispose of. And perhaps we’ll get some Arduino experience out of the deal to boot. Is it worth it? Ask us again in a few months…
– We would look at alternative DC fridge options, even though changing dimensions would require a spatial retrofit. A couple that John found (and I’m sure there are more out there):
- Furrion, with a model that uses 463 kWh/year, or 1.27 kWh/day
- Ben’s Discount Supply has various size options
– For anyone considering doing this but who isn’t sure about taking on the project themselves, JC Refrigeration does installations at their factory in addition to selling the kits to DIYers.
“Wouldn’t change a thing”
– Converting to a DC fridge in the first place – yes, in a heartbeat. It is the key piece that got us started in the conversion to all-electric for the trailer and enabled everything that followed. The removal of propane for fridge cooling and the reduction in electricity usage vs. AC power is huge.
– Great move to find JC Refrigeration, work with them to order the kit we needed, and then drive by there to pick it up. We couldn’t have planned it better if we tried, as we got lucky on the timing and location.
In summary, this fridge retrofit kicked off our whole project and has been an excellent learning experience. Ideally more new rigs come with an efficient DC fridge to begin with! Until then, if you are interested in following in (some of) our footsteps and have questions about what we did, send us a message. We’d also love to hear from people with similar experiences doing conversions like this.
Thanks for reading!

Thanks for sharing the details of this conversion project.
I’m curious to know if the conversion kit is cheaper than replacing the whole fridge with a DC powered one? Was the challenge to find one that can fit into the same space?
For Years, when my mother lived ‘off grid’ she use a SunFrost DC powered fridge. These were hand-built in the US and pretty expensive, but very efficient. They had very thick walls (extra insulation) and their compressor was on the top. Eventually, she replaced it with a larger AC powered fridge, the most efficient she could find, to which she added more insulation and she would turn it off at night, when she turned off her inverter. In time, when her battery system grew, she would leave the fridge ON 24hrs. I hear that SunDanzer makes pretty good DC powered fridges. Not sure if they have one that fits into the space you have for the fridge.
BTW, 1.24 kWh/day to run a small fridge seems like a lot to me. I measured the energy consumption of my 120v powered Maytag 22 cu-ft fridge over a period of time and it uses 0.924 kWh/day on average. I realize it is a better than average efficient fridge, but not as good as some of the off-grid fridges available, also that it sits in my fairly even tempered kitchen. I doesn’t make sense to me that the compressor would need to run continuously on any fridge. Cheers, Marc
Hi Marc! Great comments!
I’ll have to ask John about the cost question regarding the retrofit vs. replacement. My sense is that the conversion was somewhat cheaper. But a lot more involved, especially with the board issue (and then the new board added to our cost). John can also speak to the challenge of replacing the fridge with one of a different size – it does not look easy to me, but he has done some impressive handyman work with the trailer so I’ve stopped trying to guess how difficult anything might actually be.
I don’t believe there is a DC option that would directly fit into the exact same space, as far as we know.
Super interesting details about your mother’s off-grid setup, thank you for that! Great ideas for other people who are looking into this too.
We don’t have a lot of room to work with, so we’re limited on how much extra insulation we can put in (or how large of a fridge we can install), but we’re talking about trying to add some more insulation to see what’s possible. Looking ahead to next summer…
Re: usage numbers, we’ll definitely be collecting more data, especially once we get the temperature controller working again so we have a better idea of how long the fridge stays on/off every day. We’re very much “in the outdoors” so it will likely depend greatly on external temperature. I don’t expect it will need to be running 100% of the time unless (until) we return to the desert in the summer (and even then it should shut off part of the time overnight).
From a very recent couple of tests, 50% on/50% off is perhaps ballpark where it might run under “winter in the south” conditions at 30-50 deg F outside. Which would be ~0.75 kWh/day. More in line with your thoughts about this. I’ll have a follow-up post later when we eventually get everything sorted out (we’re currently in the middle of that adventure!).
Thanks again Marc!
-Marcy